Method for attaching a nosecone bulkhead
The photos below show a method for attaching a bulkhead plate to the bottom of a hollow fiberglass nosecone. This method is especially nice because it leaves the entire volume of the nosecone open for adding payloads such as the TelemetryPro transmitter. Other methods that use a threaded metal rod that runs down the center of the inside of the nosecone are not compatible with the TelemetryPro transmitter. First because the transmitter will not fit. And secondly, a metal rod is conductive and will degrade the performance of a radio downlink antenna located near it. (This is true for any downlink transmitter antenna. Not just TelemetryPro.) The method shown below or at least doing something similar to it is the recommended method for use on fiberglass nosecones with a TelemetryPro transmitter.
|
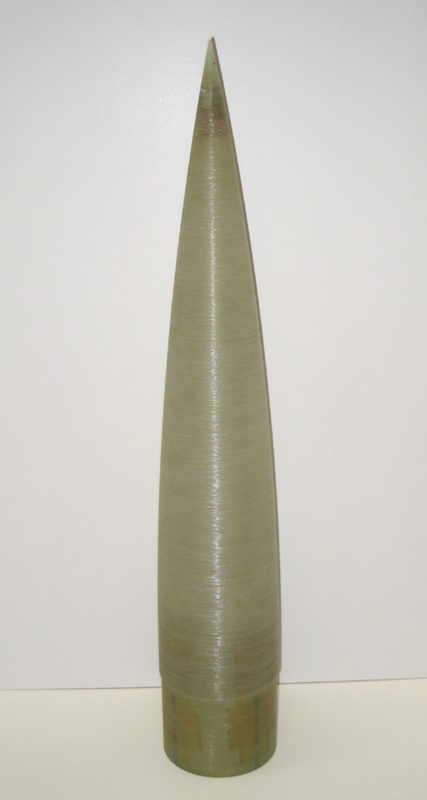
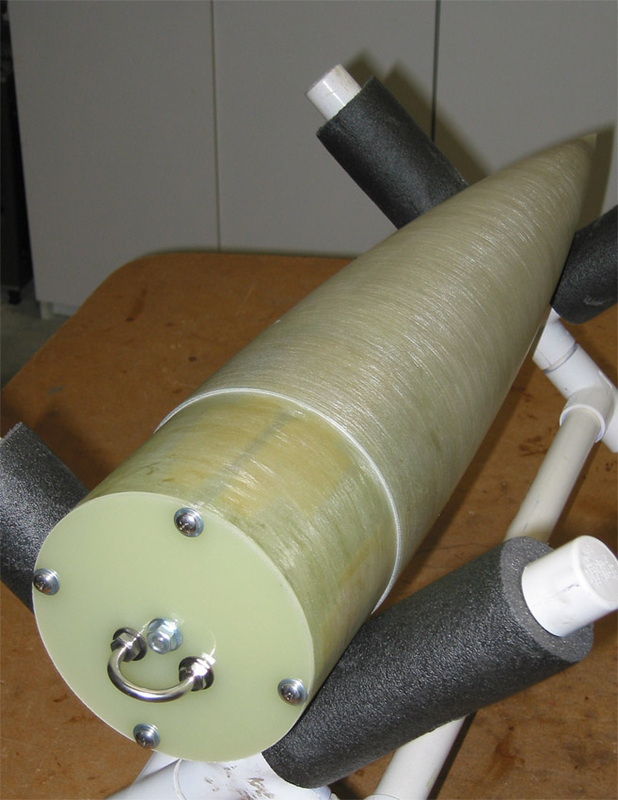
This photo shows a hollow fiberglass nosecone. It is five inches in diameter and 30 inches long. All but the very tip is filament wound fiberglass. The tip is a piece of solid fiberglass.
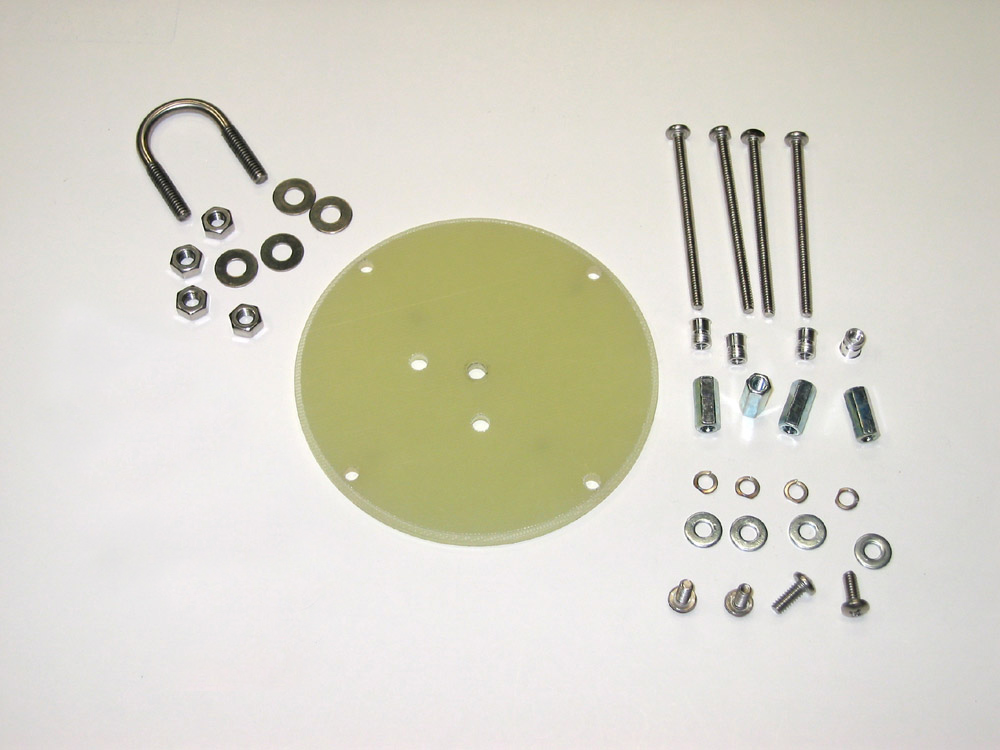
It came with a fiberglass bulkhead that serves as a rear closure for the aft end of it. In the kit, that bulkhead was originally intended to be held in place by a long threaded metal rod (1/4" diameter.) that runs down the center of the nosecone from the tip to the base. The inside tip of the nosecone came drilled and tapped for the rod. However, this is not compatible with the TelemetryPro transmitter. It will not fit with the rod installed. Instead, four machine screw anchor mounts will be installed around the inside surface of the nosecone shoulder. These will allow four screws to be used to secure the bulkhead to the bottom of the nosecone. A length of 54mm tubing can then be placed into the center of the nosecone to hold the TelemetryPro transmitter as suggested in the recommended mounting scheme. The TelemetryPro transmitter can be positioned well forward of the four machine screw anchor mounts so that they will not affect the performance of the downlink antenna. Some fiberglass nosecones have a metal tip instead of a fiberglass tip. This is not a problem as long as the TelemetryPro transmitter is mounted about 4 inches or so behind the tip. Doing so allows the GPS antenna on top of the TelemetryPro transmitter to "see around" the metal tip to receive signals from the GPS satellites. |
|
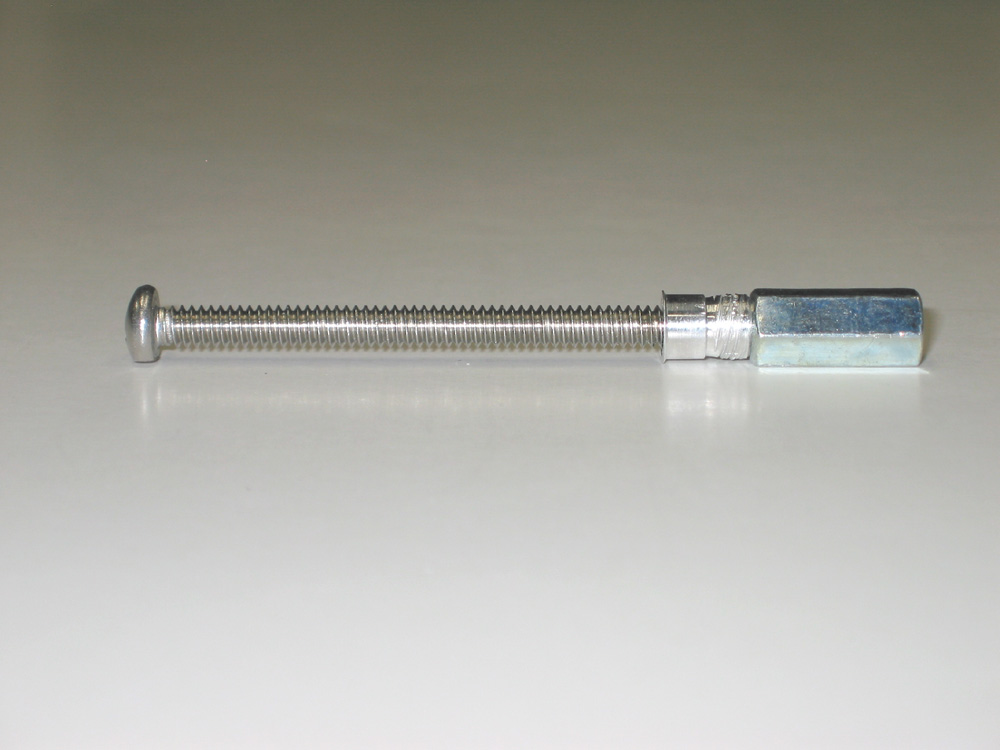
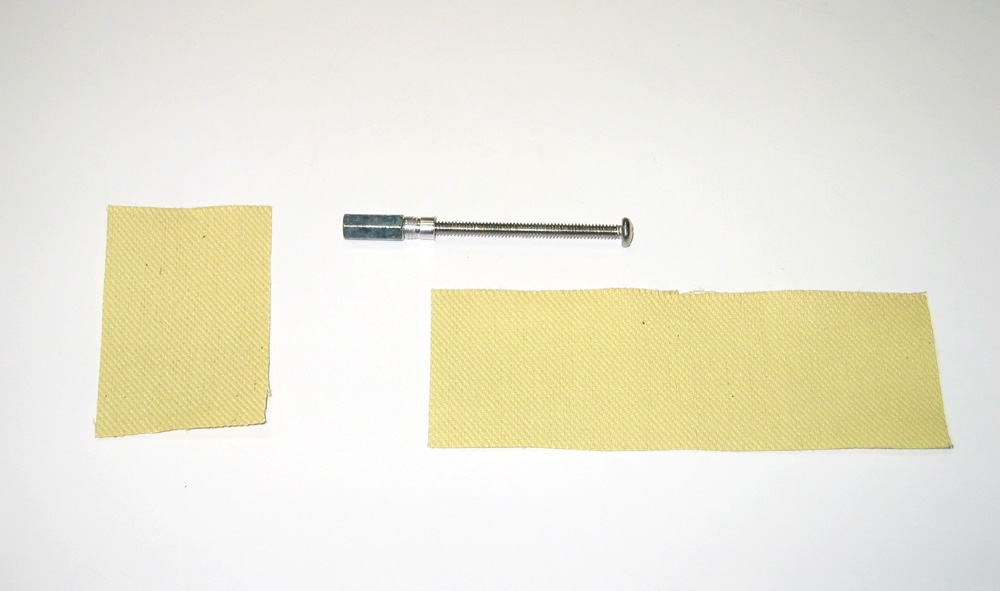
This shows one of the mounting anchors. The left end is a #10-24x3" pan head machine screw that has two pieces threaded onto the tip of it. The very tip is a standard hex coupler nut about 3/4" long. Just to the left of that is a small #10-24 mounting nut that is simply used for tightening up against the hex coupler to hold it in place. Look close and you can also see that the bottom side of the pan head bolt has been filed flat so that the whole assembly will lay nice and flat. |
|
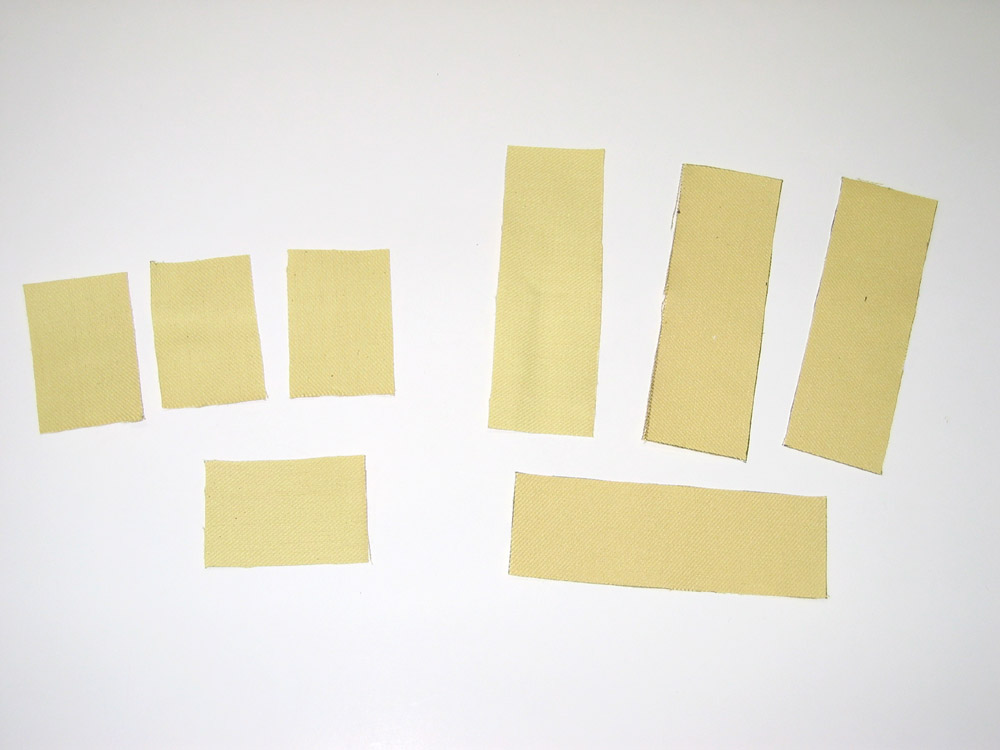
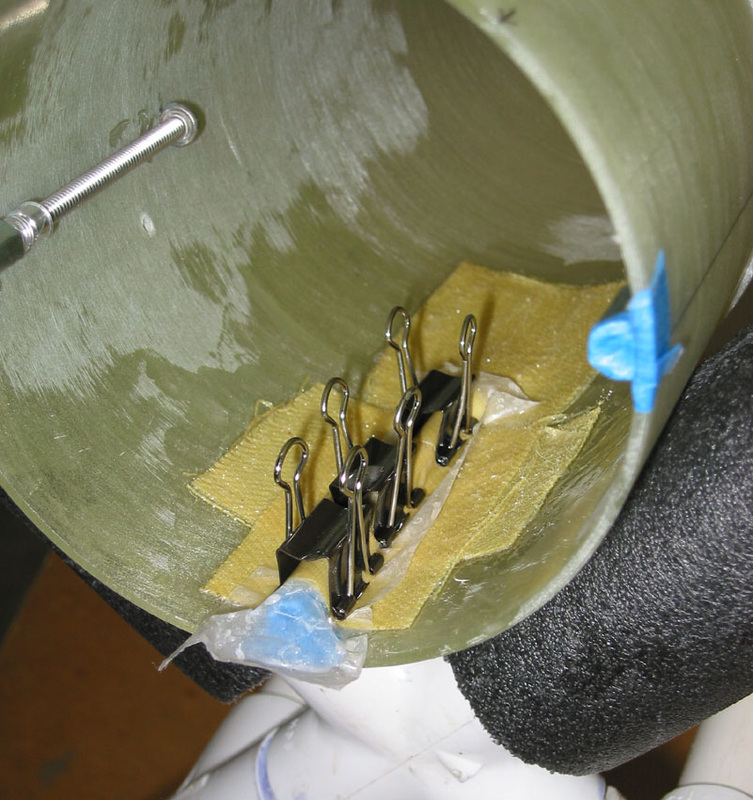
Eight strips of Kevlar cloth were used to bond the anchors to the inside surface of the nosecone shoulder. The Kevlar is 8 oz cloth 0.026" thick and available from Thermostatic Industries, Inc. |
|
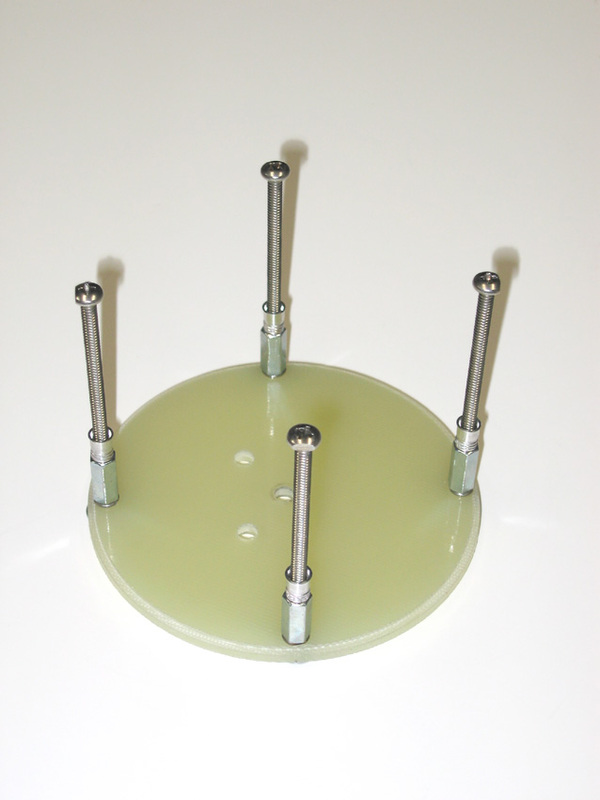
All four anchors were attached to the nosecone bulkhead. A small amount of epoxy was applied to the outside edge of each anchor. The bulkhead was then installed into the bottom of the nosecone. The epoxy was then allowed to cure and it bonded the anchors to the inside surface of the nosecone. At that point the bulkhead was removed and the anchors remained tacked in place to the inside surface of the nosecone. This procedure was used because it precisely aligns the mounting anchors to the holes in the bulkhead. |
|
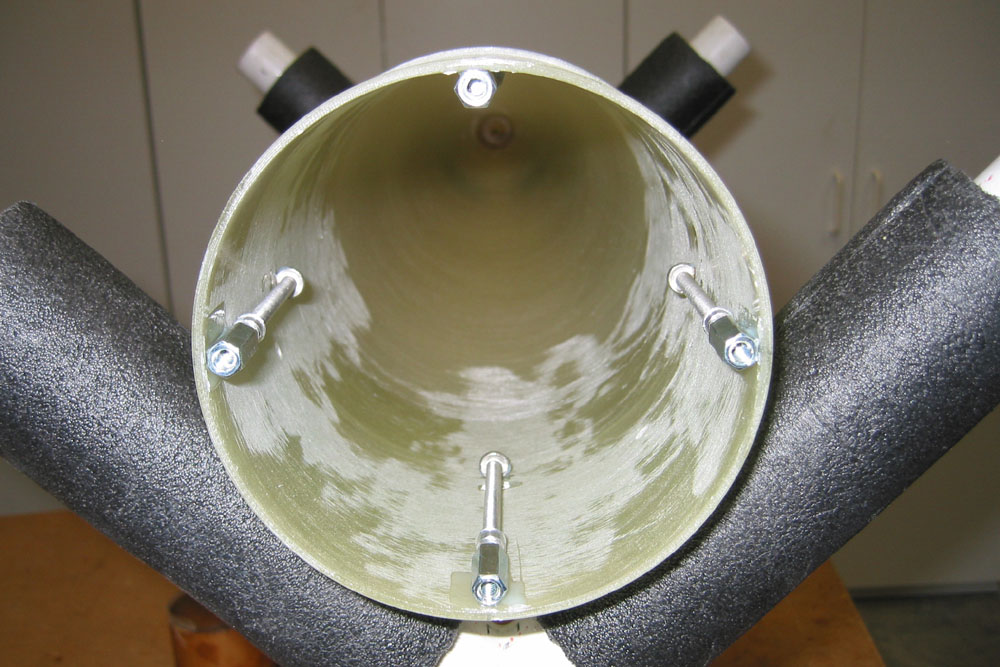
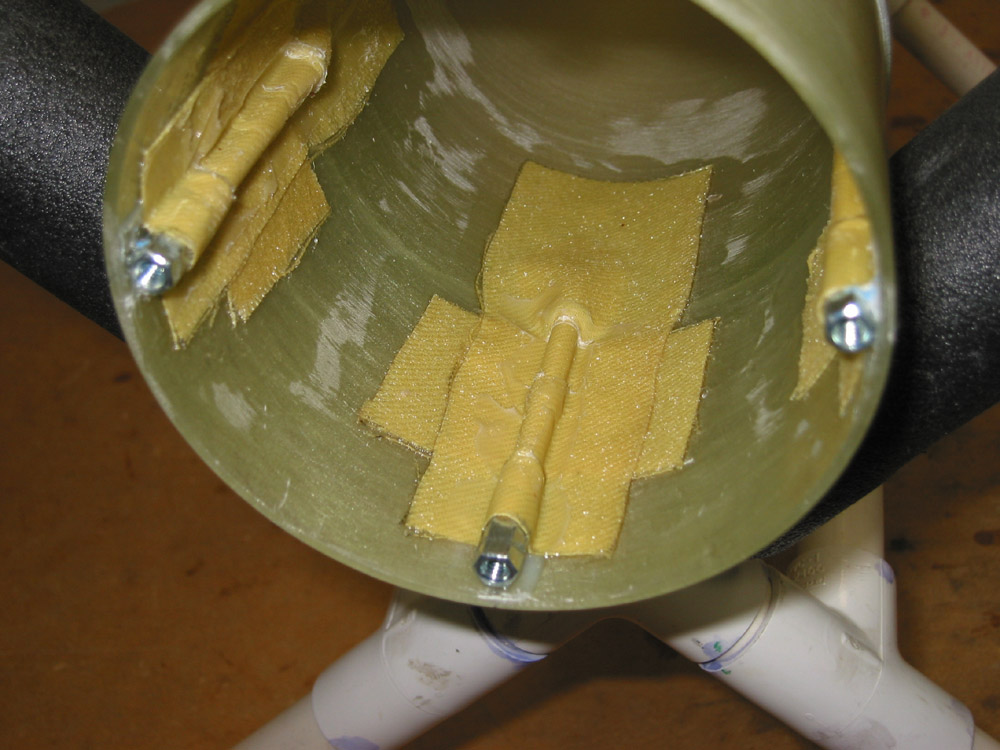
Once the West System Epoxy had cured, the clamps and the wax paper were removed. The result is a very strong bond to the inside surface of the nosecone shoulder. All four anchors have been completed in this photo. The ends of the anchor bolts (the hex couplers) are visible extending out the edges of the Kevlar. The ends were recessed just enough to match the inside surface of the bulkhead when it is mated with the bottom of the nosecone. |
|
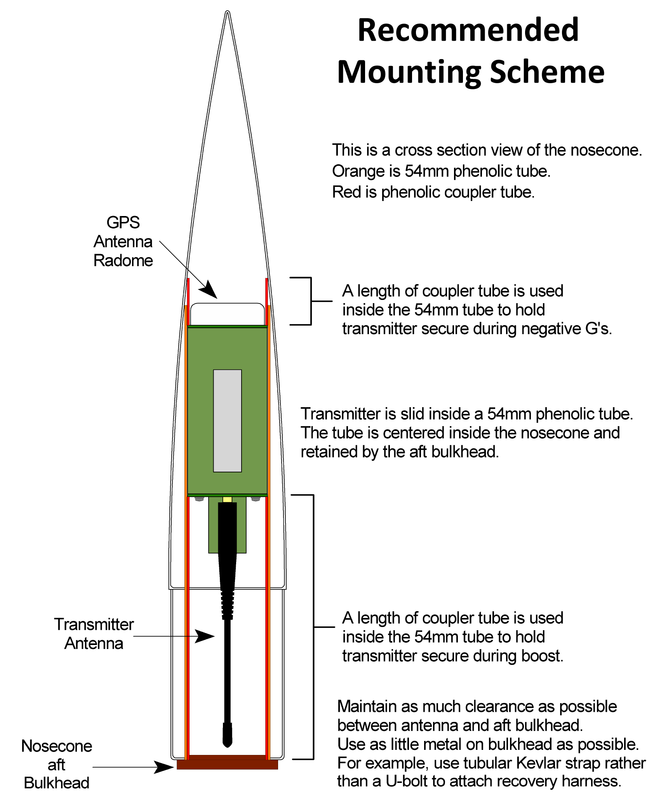
All that remains is to cut some 54mm tubing (phenolic or fiberglass) that fits inside the nosecone as per the recommended mounting scheme shown here. The TelemetryPro transmitter should be positioned well forward of the four anchor mounts so that they will not affect the performance of the downlink antenna. |

